Windows 11/10 offers multiple keyboards, and it’s easy to add them, it’s important to note that you can also change Windows 11/10 Keyboard layout or language. Even though very basic, it is essential, especially when you are using a touch screen to type. In this guide, we will share how you can change the Windows 11/10 keyboard layout and also add a new keyboard.
Change Windows Keyboard Layout

While a keyboard is available by default when you install Windows based on the language, you can add a new one. You can always switch between the default or multiple keywords easily.
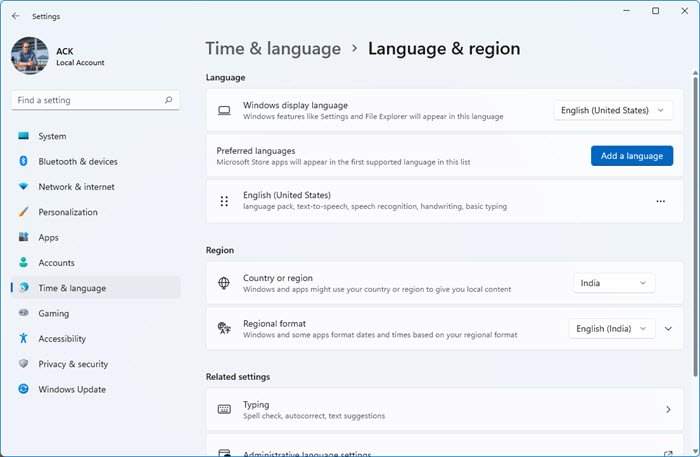
- Go to Settings > Time and Language > Language and Region > Add a language.
- Once installed, hover over it and click on Options.
- Now click on Add a Keyboard and exit.

Now that you have a keyboard installed let’s see how you can change the Windows keyboard layout.
There are two ways to understand the layout part. One where you change the entire keyboard and second where you want its position to change in such a way that it’s easily accessible.
TIP: Microsoft Keyboard Layout Creator lets you create custom keyboard layouts.
Change the complete keyboard or switch between keyboards
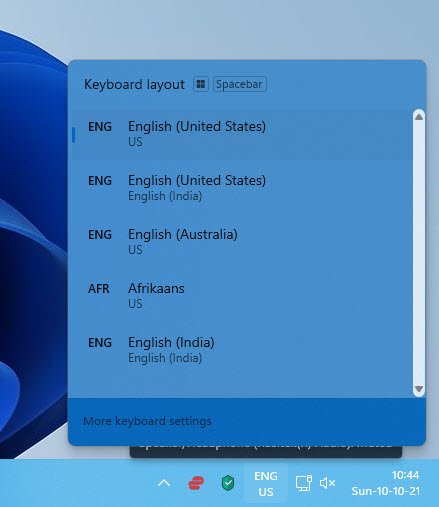
Press WIN key + Spacebar to open the keyboard switcher.
Press the spacebar again, and it will switch between the installed keyboard.
TIP: Check this fix if Windows 10 keeps changing keyboard layout automatically.
Change keyboard placement in Windows 11/10

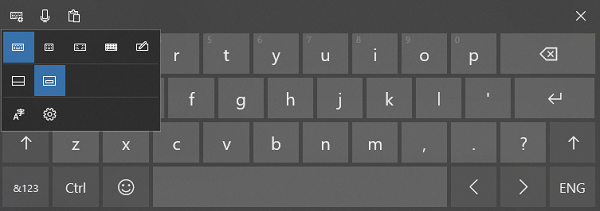
Look for a keyboard icon on the taskbar. Tap to launch it.
On the top left of the keyboard, look for a keyboard icon with configuration.
Tap to open it, and here you can choose between different layout including:
- Standard
- Floating
- Split
- Full keyboard.
Since most of the tablets and laptops screen is going to be bigger, its best to choose Split. You also have the option to use the microphone and clipboard.
If you need to use a pen, you can use the last one to use either your fingers or a digital pen. Useful when you need to sign in documents.
Let us know if this helps.
Related: Can’t remove a Keyboard layout.