This post explains how to create a live kernel memory dump file using Task Manager. Microsoft has introduced a new troubleshooting feature in the Windows operating system to help administrators resolve bugs and crashes. Users can now create live dumps to capture memory information for abnormal situations. These dump files consist of a consistent snapshot of Kernel memory (with the optional inclusion of user-mode memory and hypervisor memory), minidumps (with secondary data), and additional information to examine system state, non-fatal errors, driver issues, and BSODs.

Live dumps are similar to crash dump files (for individual processes), but you may capture them without waiting for a system crash or OS reset.
Create Live Kernel Memory Dump File using Task Manager in Windows 11
To create a live kernel memory dump on a Windows 11 PC, right-click on the Taskbar and select Task Manager to open it.
In the Task Manager window, click on the Details tab in the left panel.
Now type ‘system’ in the search bar on top and locate ‘System’ in the search results. You may also find this option under Windows processes in the Processes tab.

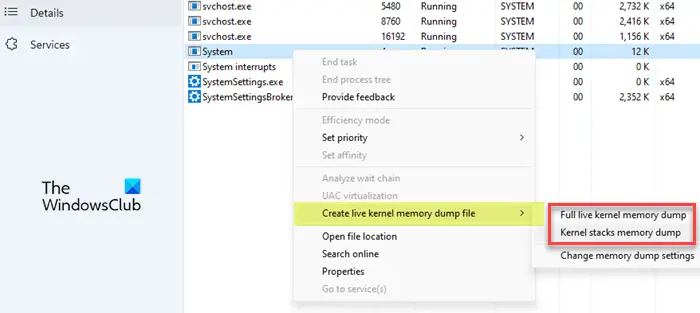
To create a live kernel memory dump, right-click on System and take the cursor over the Create live kernel memory dump file option. You will see the following options to create dump files:
- Full live kernel memory dump: This option creates a dump file that contains active kernel memory with options to capture other types of memory, including user-mode memory and hypervisor memory.
- Kernel stacks memory dump: This option creates a smaller file that consists of kernel processor states and all kernel thread stacks.
The third option – Change memory dump settings – lets you customize the live memory dump file creation, as described in the next section.
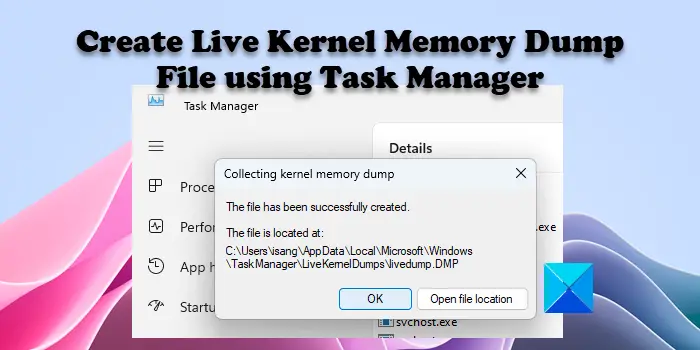
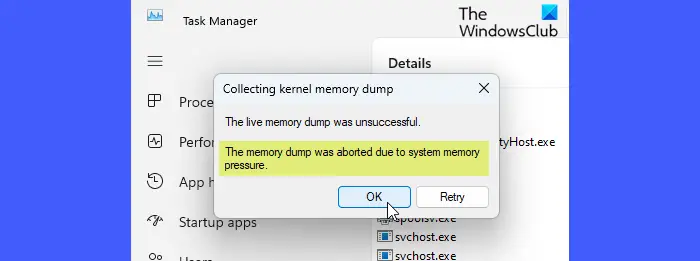
Click on any of the above two options to create a live kernel memory dump. Depending on the system state, the kernel memory dump collection may succeed or fail. If it succeeds, Windows will save the live memory dump file on your PC. However, if the dump file creation fails, you will see a prompt explaining why the memory dump was aborted.

By default, the live kernel memory dumps are saved at the following location:
%LocalAppData%\Microsoft\Windows\TaskManager\LiveKernelDumps
And the live user-mode memory dumps are saved at the following location:
%LocalAppData%\Temp
Please note that while there are more ways to open Task Manager in Windows, you may open it using administrator privileges to get the best results while creating a live kernel memory dump.
Read: Windows Memory Dump Settings
Customize Live Kernel Memory Dump Settings and Options
To capture hypervisor pages or user-mode memory pages in a live kernel memory dump, you may use live kernel memory dump file options available under the Task Manager settings. However, bear in mind that including additional information will not only increase the size of the dump file but also use additional memory resources, which may impact system responsiveness.
To access these options, either click on the Settings tab in the bottom-left corner of the Task Manager window, or use the Change memory dump settings option that appears when you click on the Create live kernel memory dump file option.

Scroll down to the bottom of the Settings page. You will see the following advanced options:
- Abort if insufficient memory: Use this option to stop the live dump process when there’s insufficient memory.
- Capture Hypervisor pages: Use this option to capture memory regions used by the hypervisor to support Hyper-V and virtual machines. Select the Include nonessential pages option to capture non-essential hypervisor memory pages.
- Capture User Pages: Use this option if the issue you’re diagnosing requires user-mode memory.
This is how you create a live kernel memory dump file in Windows 11. I hope you find this tip useful.
Read: Difference between Kernel Mode and User Mode in Windows.
How do I create a memory dump in Task Manager?
To create a memory dump, open the Windows Task Manager app using administrator privileges. Click on the Processes tab. Then right-click on the desired process and select Create a memory dump file. Wait until a message prompt appears confirming the success of the file creation. Click on the Open file location button to access the file.
Read: How to read a Mini/Small Memory Crash Dump (DMP) file in Windows
What does creating a dump file in Task Manager do?
Dump files contain a consistent snapshot of the kernel memory (and/or other types of memory) at the time the dump was created. Programmers can analyze these files to diagnose issues with drivers, applications, and services on Windows systems.
Read Next: What are System Error Memory Dump Files in Windows?