Windows 10 Task Manager provides more information on processes. You can easily find which application utilizes CPU, Memory, Disk, and Network Usage. In this post, we will show you how to disable the Task Manager in Windows 11/10 If you want to do so for security reasons.
How to disable Task Manager in Windows 11/10
You can enable or disable Task Manager either of the three ways:
- Local Group Policy Editor
- Registry Editor
- Ultimate Windows Tweaker.
While we have shown how to disable it, you need to reverse the changes to enable it. Let’s take a look at the steps involved in each of the methods.
1] Disable the Task Manager via Local Group Policy Editor

To disable Task Manager via Local Group Policy Editor, do the following;
- Press Windows key + R to invoke the Run dialog.
- In the Run dialog box type gpedit.msc and press Enter to open Group Policy Editor.
- Inside the Local Group Policy Editor, use the left pane to navigate to the path below:
User Configuration > Administrative Templates > System > Ctrl+Alt+Del Options
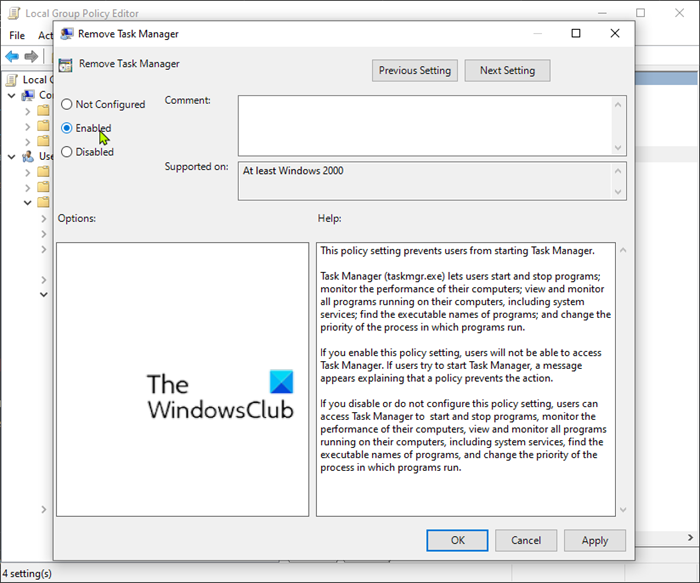
- On the right pane, double-click on the Remove Task Manager policy to edit its properties.
- In the policy properties window, set the radio button to Enabled.
- Click Apply > OK to save the changes.
2] Disable the Task Manager via Registry Editor

Since this is a registry operation, it is recommended that you back up the registry or create a system restore point as necessary precautionary measures. Once done, you can proceed as follows:
- Press Windows key + R to invoke the Run dialog.
- In the Run dialog box, type regedit and hit Enter to open Registry Editor.
- Navigate or jump to the registry key path below:
HKEY_CURRENT_USER\SOFTWARE\Microsoft\Windows\CurrentVersion\Policies
- At the location, on the left pane, right-click on the Policies folder.
- Select New > Key.
- Name the key as System.
- Next, click on the newly created System key.
- On the right pane, click on the empty area and choose New > DWORD (32-bit Value).
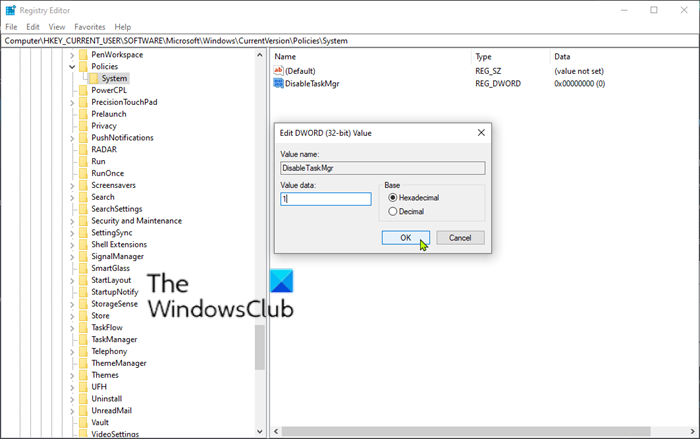
- Name the value DisableTaskMgr.
- Next, double-click the DisableTaskMgr to edit its properties.
- In the properties window, input 1 in the Value data field.
- Click OK to save changes.
Next, navigate or jump to the following registry path:
HKEY_LOCAL_MACHINE\SOFTWARE\Microsoft\Windows\CurrentVersion\Policies\System
- At the location, on the right pane, create the DisableTaskMgr key and set the Value data to 1.
- Exit Registry Editor and restart your computer.
Read: Task Manager is not responding, opening, or disabled by the administrator.
3] Ultimate Windows Tweaker

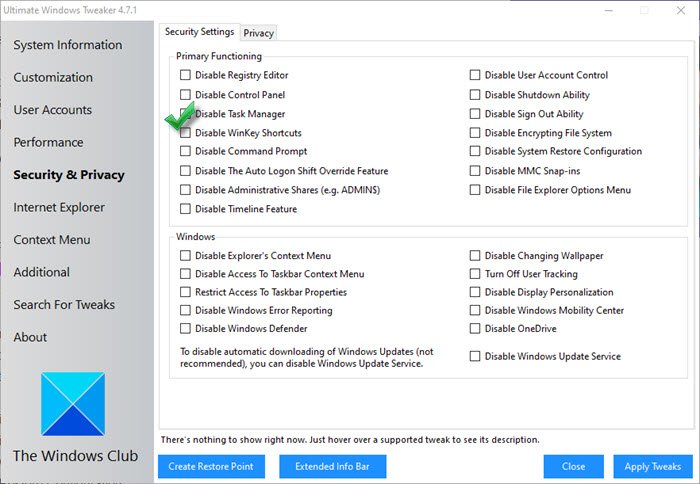
Use our freeware Ultimate Windows Tweaker to do this with a click! You will see the setting under Security & Privacy > Security Settings > Disable Task Manager.
You can also use our free tool FixWin if the Task Manager is not opening quickly.
That’s it! These are the three ways to disable the Task Manager in Windows 10.
Is it okay to disable the Task scheduler?
While you can, you should not disable the Task Scheduler. Windows and other software use this built-in program to run background service that is essential and useful. For example, using Task Scheduler, Windows runs a malware scan in the background. If you disable the task scheduler, these programs will never run. The same applies to Windows updates. So unless you manually check, the expected services will not run and can cause problems.
Is it OK to disable all startup programs?
Technically yes, it’s safe to disable the Startup Programs. Applications register themselves with Startup, so the services are ready to use once you log in to your PC. However, they also substantially increase the load time when the numbers increase. The better approach is to selectively choose what you need and disable the rest of the services. For example, if you often take screenshots, you need the application to be up and running and respond to shortcuts when you login to your account.