In this guide, we are going to discuss how you can use Windows Security on Windows 11 for the best protection. Windows 11 comes with its built-in antivirus suite which is called Windows Security (also generally referred to as Windows Defender or Microsoft Defender). It has some great security features that you can use to get the best protection on your PC. In this article, we are going to list some tips to use Windows Security and protect your device from several threats, viruses, and malware.
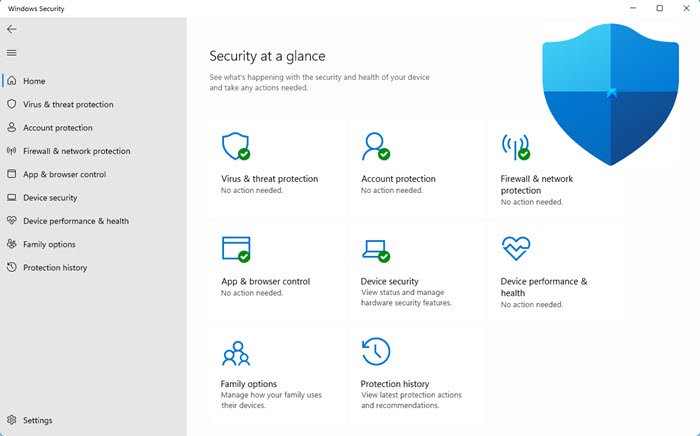
How to use Windows Security in Windows 11 for maximum protection
Here are the tips you can follow to use Windows Security in Windows 11 for best protection:
- Always Install the Latest Windows Updates on your PC.
- Perform Virus Scans at Regular Intervals.
- Configure Virus & Threat Protection Settings.
- Enable Anti-Ransomware Protection.
- Exclude Specific Items from Scans.
- Use Account Protection options.
- Enable Firewall & network protection.
- Configure App & Online Security Settings.
- Checkout Device Security options.
- Determine Device performance & health.
- Manage Parental Controls and Connected Devices.
1] Always Install the Latest Windows Updates on your PC
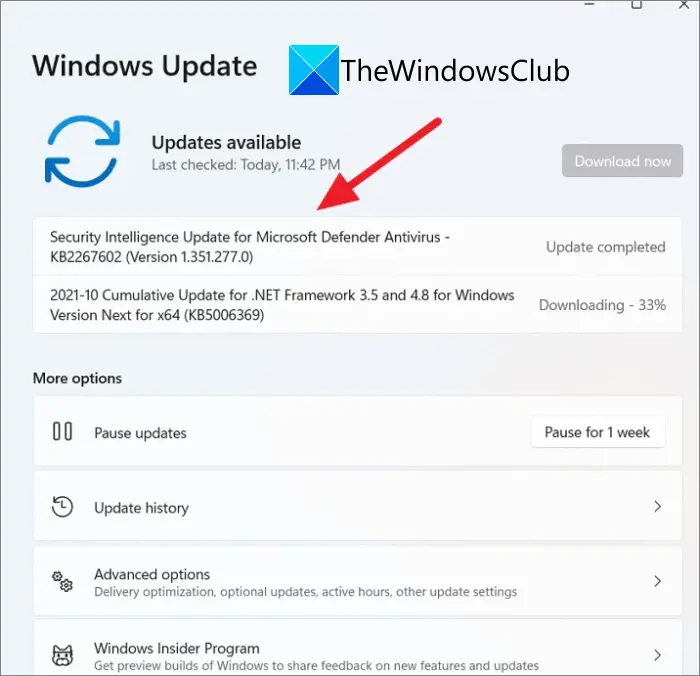
First and foremost, you should make sure that you have installed all the latest Windows updates on your PC. With the latest updates, new security patches are installed on your system that enhances the overall security of your device. Also, for Windows Security to work properly and effectively, you have to be on the latest Windows build.
So, open the Settings app using Windows + I hotkey and then go to the Windows Update tab. After that, check for available updates and then download and install them.
2] Perform Virus Scans at Regular Intervals
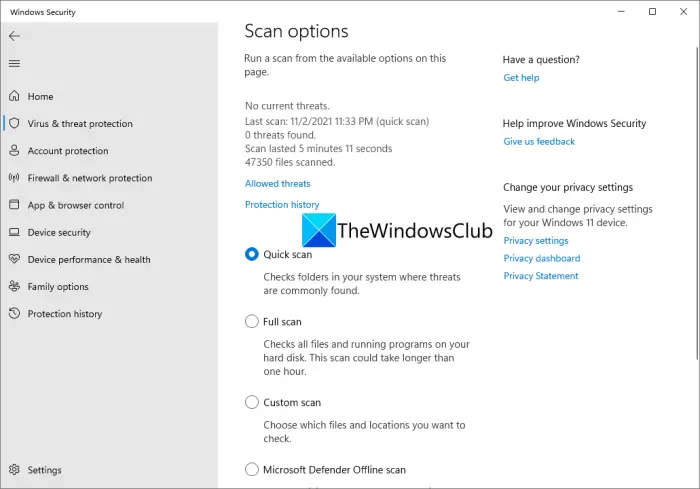
Always perform virus scans at regular intervals to detect viruses and malware on your system and then perform an appropriate action. There are different types of scans that you can perform including:
- Quick Scan: It takes the least amount of time, is used to check folders where threats are found commonly.
- Full Scan: This can take more than an hour, used to check all files and run programs on your hard disk.
- Custom Scan: You can check for custom files and folders that you want to scan for viruses.
- Microsoft Defender Offline scan: It can perform a boot-time scan and remove difficult-to-remove malware from your system using up-to-date threat definitions.
To run any of the above scans, simply open the Windows Security app from the Start menu. And then, move to the Virus & threat protection tab and click on the Scan options button. After that, select the type of scan you want to perform and press the Scan now button.
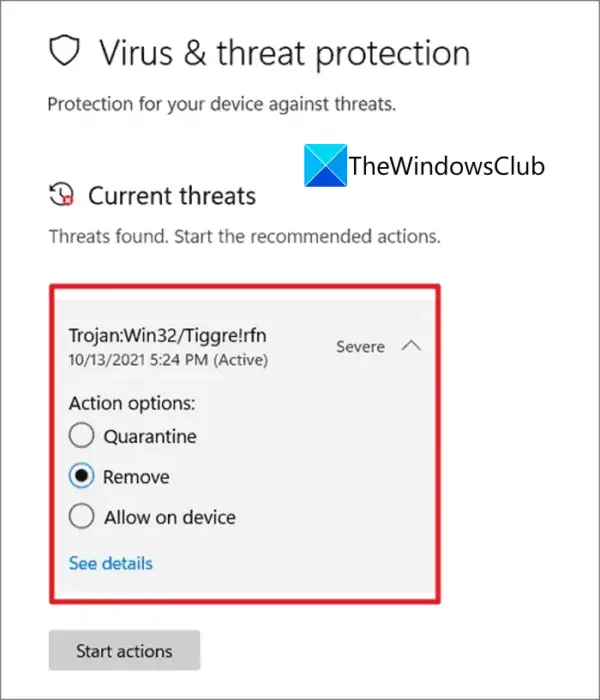
When the virus scan is complete, it will show you the results. In case there is no virus or malware on your PC, it will show a “No Current Threats” message. If there are viruses and threats detected on your system, you will get a Threats Found notification. You can click on the notification to open the scan results, and then take one of these actions on the threat: ‘Quarantine’, ‘Remove’, and ‘Allow on device’.
Read: Windows Defender Offline Scan vs Full Scan vs Quick Scan explained
You can also see details on a particular virus or threat including what kind of threat it is, alert level, status, which files are affected, etc. Windows Security also provides a dedicated Protection history tab to check and manage the latest protection actions and recommendations.
Read: How to reset the Windows Security app.
3] Configure Virus & Threat Protection Settings
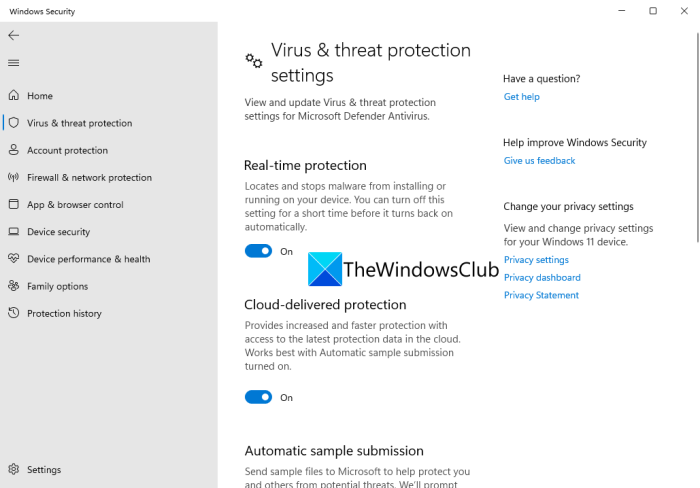
To get the best out of Windows Security, you can configure the virus and threat protection settings accordingly. For that, open Windows Security and go to the Virus & threat protection tab. Now, click on the Manage settings button present under the Virus & threat protection settings. From here, you can enable/ disable the following settings as per your requirements:
- Real-time protection– provides automatic protection against viruses and malware in real-time.
- Cloud-delivered protection– provides strong and faster protection using the latest protection data and fixes from the Microsoft cloud.
- Automatic Sample submission– sends information about threats it detects to Microsoft to improve the app.
- Tamper Protection– it blocks modifications to Microsoft Defender Antivirus components from outside the app.
Read: Privacy and Security Settings in Windows 11.
4] Enable Anti-Ransomware Protection
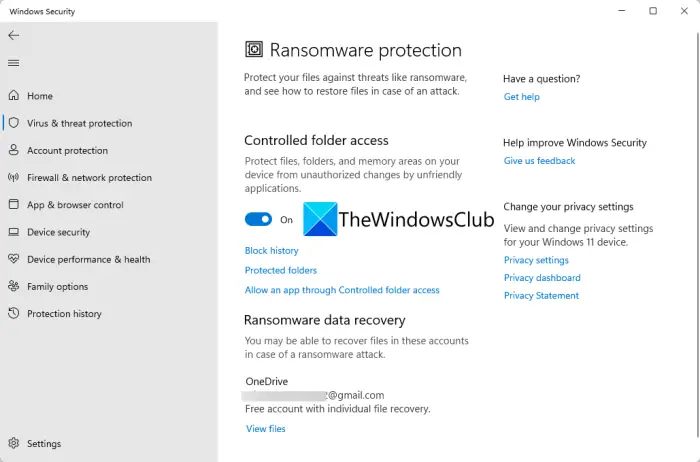
As ransomware malware is on the rise, you should make sure you have enabled anti-ransomware protection in Windows Security. You can use the two anti-ransomware protection for that including ‘Controlled folder access’ (which is a part of the Exploit Guard feature) and ‘Ransomware data recovery’ (helps you protect your data from Ransomware). To use these features, you can follow the below steps:
- Open Windows Security app.
- Go to the Virus & threat protection tab.
- Scroll down and select the Manage ransomware protection option.
- You can add protected folders by clicking on the Protected folders option.
- If you want, you can allow an app through controlled folder access.
Read: Disable Open File Security Warning for files in Windows.
5] Exclude Specific Items from Scans
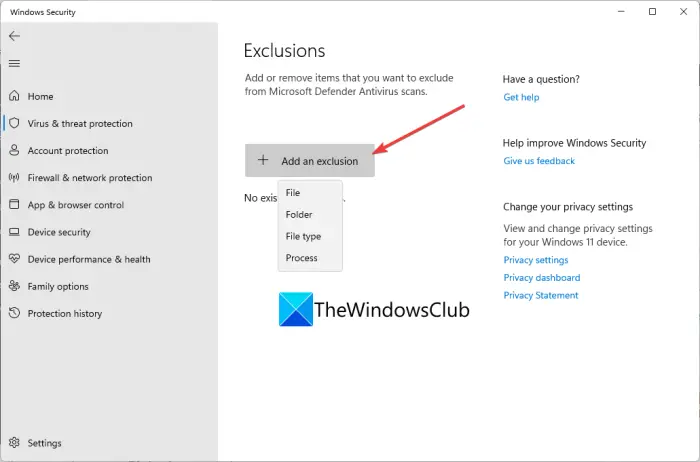
In case you have specific files, folders, or programs that you don’t want Windows Security to scan for viruses, you can add them to the exclusion list. However, be very sure that the items you are excluded from virus scans are trusted and safe. Here are the steps to exclude specific items from virus scans:
- Open Windows Security and navigate to the Virus & threat protection tab.
- From the right pane, click on the Manage settings button.
- Scroll down to the Exclusions section and then press the Add or remove exclusions button.
- Click on the Add an exclusion button and then choose an item from File, Folder, File type, and Process that you want to exclude from the scan.
- Select the item and then press OK.
See: How to manually allow a blocked file or app in Windows Security.
6] Use Account Protection options
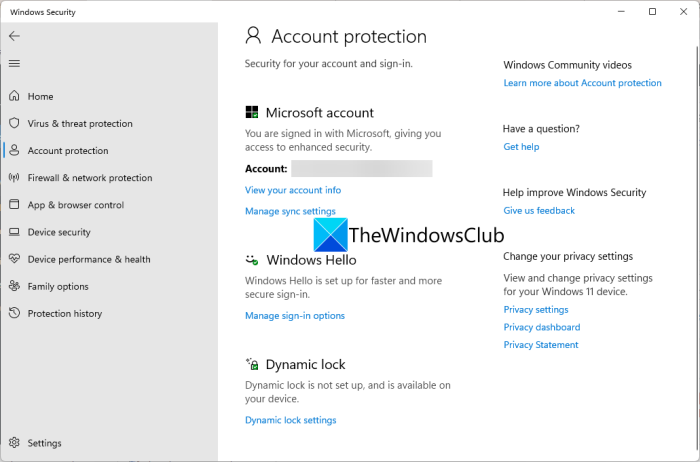
Windows Security also provides several options to notify security issues with your account and let you take appropriate actions to enhance your account protection. You can enable Windows Hello secure sign-in options including Face Recognition and Fingerprint, as well as enable the Dynamic Lock feature. Plus, you can also review and change account settings from here.
Related post: Reset Windows Security settings to default values.
7] Enable Firewall & network protection
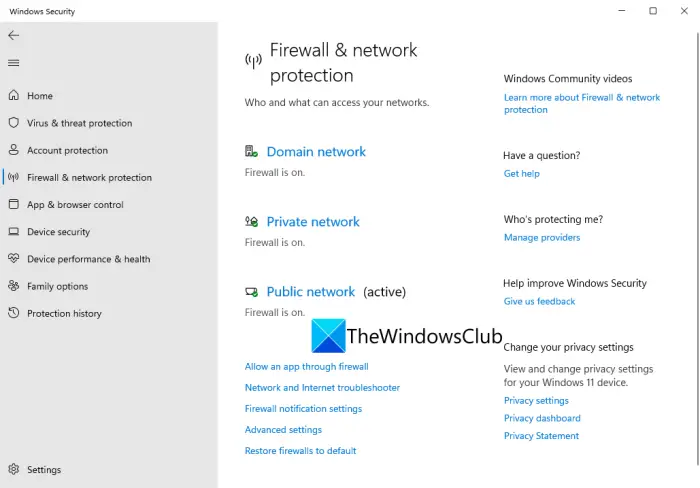
Another great security option that you must use on your PC is a firewall and network protection. Windows Security enables you to monitor and control network security with Microsoft Defender Firewall settings. You can open the Windows Security app and go to the Firewall & network protection tab. From here, you can enable the firewall on Domain, Private, and Public networks. Additionally, you can also access some more firewall settings from here including Network and internet troubleshooter, Firewall notification settings, Restore firewalls to default, etc.
See: How to prevent Malware – Tips to secure Windows.
8] Configure App & Online Security Settings
As most of the time, you are on the web doing your work, it is crucial to enable online security. Windows Security provides a dedicated component for app protection and online security. You can go to the ‘App & browser control’ tab to access related settings.
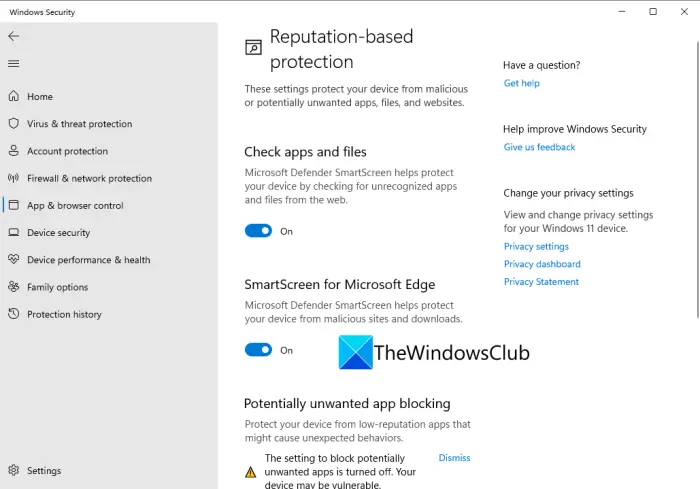
It offers a Reputation-based protection feature using which you can control the Windows Defender SmartScreen feature that protects your PC against malicious and potentially unwanted apps, files, websites, and downloads. You can click on the Reputation-based protection settings option to configure functions like Check apps and files, SmartScreen for Microsoft Edge, Potentially unwanted app blocking, and SmartScreen for Microsoft Store.
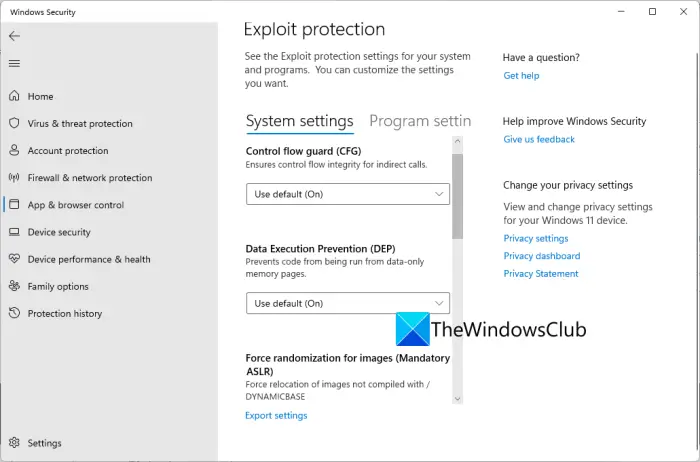
You can also use its Exploit Protection feature that protects the PC from the malware that exploits software vulnerabilities. To configure related settings, click on the Exploit protection settings option. From here, you can configure System settings (CFG, DEP, Randomize Memory Allocation, etc.) and Program settings (apply mitigations to individual apps).
Read: How to reset the Windows Security app.
9] Checkout Device Security options
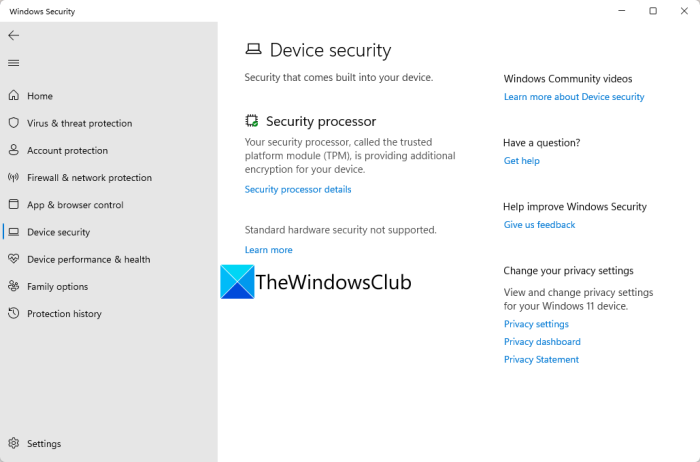
You can also find a dedicated tab called Device Security in Windows Security that provides you an insight regarding built-in security features in your device. The security features include Core isolation, Security processor, and Secure boot. Security processor (TPM 2.0) and Secure Boot.
RELATED: Virtualization-based Security not enabled in Windows 11.
10] Determine Device performance & health
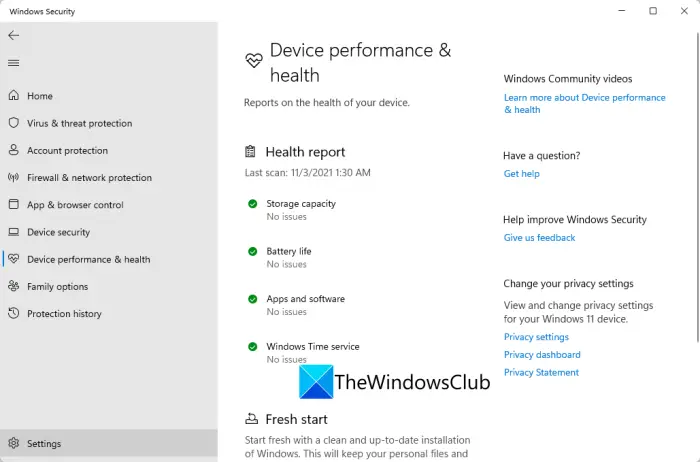
There is a Device performance & health tab in Windows Security that shows you the current status of your device’s storage capacity, battery life, apps and software, and Windows Time Service. You can have a glance at it and check out if there are any issues with your device. If there are no issues, great! In case there are some issues, you can see the recommendation and take appropriate actions to counter them.
Read: How to Enable Password Reuse or Unsafe password storage warnings in Windows Security.
11] Manage Parental Controls and Connected Devices
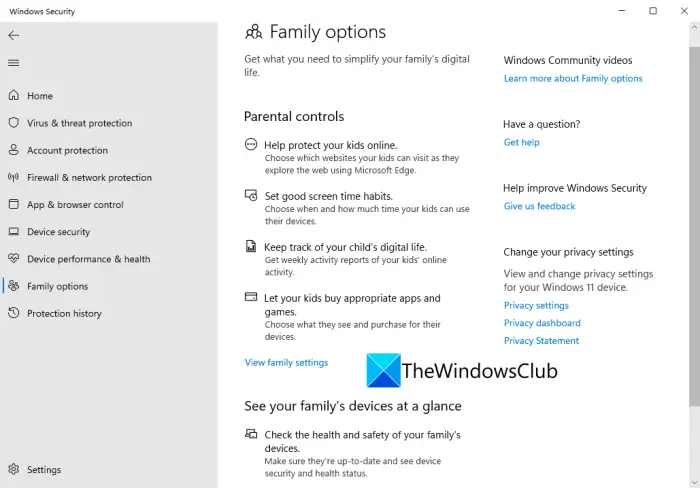
You can also manage Parental Controls from Windows Security. And, it also lets you check the health and safety of your family’s devices connected to your Microsoft Account.
Windows Security not opening on Windows 11?
There are some users who have complained that Windows Security won’t open on their PC. If you are facing the same issue, you can try reinstalling it via Powershell, resetting the app, running SFC and DISM scans, or uninstalling the third-party security suite if you are using one. Some more guides will help you resolve problems concerning Windows Security:
- Windows Security closes immediately after opening.
- Windows Security says No Security Providers.
- Can’t turn on Windows Defender.
Is Windows Security good on Windows 11?
Yes, Windows Security works and protects Windows 11 well. No matter whether you need to protect your computer from virus, malware, adware, ransomware, etc., or anything else, you can opt for Windows Security for sure. The latest update of Windows Security comes with many essential options that you can see in the paid anti-malware apps.
Read: Difference between Microsoft Defender, Windows Defender, Windows Security, Windows Defender Firewall
Related reads: