If the Snip and Sketch tool doesn’t cover the whole screen on your Windows 11/10 PC, then this post will help you. This issue usually occurs due to the system scale rather than any issue with hotkeys.

Windows 11 Snip and Sketch tool doesn’t cover the whole screen
In this part of the post, we will let you know about three working fixes to resolve the issue when the Snip and Sketch tool doesn’t cover the whole screen:
- Configure the scaling of your monitor
- Change the resolution of the second monitor
- Use third-party screenshot software
Let’s understand all these solutions and apply the exact process to resolve your Windows system snip and sketch tool that doesn’t cover the whole screen issue.
1] Configure the Scaling of Your Monitor
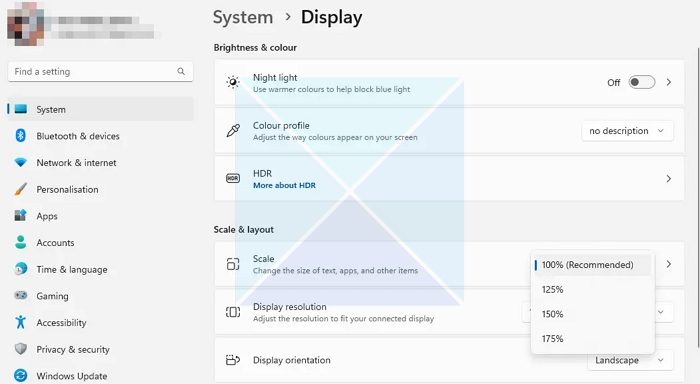
This issue usually occurs when you use two displays with different scaling settings. For example, if your primary display is set with 100 % scaling, but the secondary display is at 125%, it will break.
Undoubtedly incorrect scaling settings of the display are the prime cause of the Snip and Sketch tool’s failure to capture the whole screen. Ideally, both displays should be on the same scaling settings. The error usually happens when the scaling settings of both displays vary. Now follow the below steps to configure the scaling of your monitor.
- Press the Win+I keys together to open the Settings option.
- Navigate to System> Display option
- Now, you will get the Scale settings from the right side panel under the Scale and Layout.

- Extend the dropdown menu under it, select whatever percentage you want for both displays, and reboot the System to make the changes.
Make sure to check if the issue is resolved after this.
2] Change the Resolution of the Second Monitor
Most users who use multiple monitors have different types of displays, and their resolution doesn’t match. One could be of higher resolution than the other, which can also cause the issue.
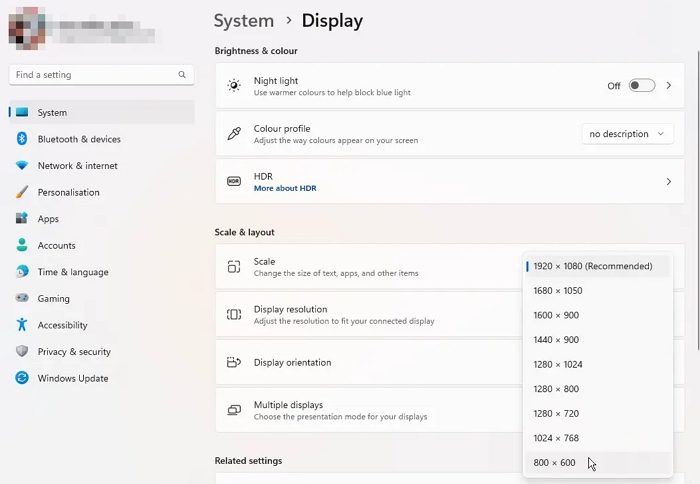
If you cannot fix the issue by changing the scaling settings, you can set the resolution to lower or the same as that of other monitors. In short, match the resolution of the monitor as closely as possible. With this simple change, the snipping tool will work perfectly and capture the whole screen.
Follow the below steps to change the resolution of the second monitor.
- Press Windows + I keys simultaneously to open the Settings option; now click on the System from the left side panel. And choose the Display option from the right side panel.
- Now, search for the Display resolution option under the scale and layout section. Now click on the dropdown and select the lower resolution option.

- After choosing the required resolution, it will ask for keep changes or revert. Just click on Keep Changes to set the monitor screen lower resolution.
3] Use Third-Party Screenshot Software
Suppose nothing works for you, or you lack technical knowledge of the System or display scaling. In that case, you can use any trusted and supported third-party screenshot software to capture the entire screen or take a screenshot without any issues.
I hope this helps.
How do you zoom out on Snip and Sketch?
There are two ways to zoom out—Using the keyboard and UI with the mouse. When the Snip and Sketch tool is open, hold the Ctrl button on the keyboard, and press the minus sign, and it will zoom out step by step. Alternatively, you can use the zoom slider located at the bottom of the Snip and Sketch window to zoom out. Simply click and drag the slider to the left to zoom out.
How do I make Snip and Sketch full-screen?
Once Snip and Sketch tool is open, click the Maximize button at the window’s top-right corner. It looks like a square icon next to the minimize and close buttons. It will be only visible when you launch the tool, and the screenshot tool appears with everything dim in the background.